Dave Walton
-
Posts
44 -
Joined
-
Last visited
-
Days Won
1
Recent Profile Visitors
1,306 profile views

Dave Walton's Achievements
")


-
Another Premier Elite Question.
Dave Walton replied to Dave Walton's topic in !!..DIY Installers..!!
Indeed, personally I can't get my head around people not using part set, why wouldn't you, once set up right it's great, press 2 keys, and go to bed........ In part set I have the whole of the downstairs and the two upstairs rear bedroom windows armed, (Single storey flat roof at rear so those windows are vulnerable) the landing off and the stairs timed, allows everybody to go to the loo during the night........ -
Hi all. I have a question for anyone familiar with the above mentioned panel. In programming I'm setting up the chime on the entry / exit front door, unlike my previous panel, chime only sounds when door is opened, is there an option somewhere that will allow me to enable the chime to sound on both the opening and closing of the entry / exit door, the only options I can find for the chime are chime 1 (Single Tone) chime 2 (Double Tone) and on or off. Regards, Dave.
-
Texecom Premier Extension Speaker Wiring.
Dave Walton replied to Dave Walton's topic in !!..DIY Installers..!!
Thank you. (I don't have the wiring instructions, this kit came to me as previously used) -
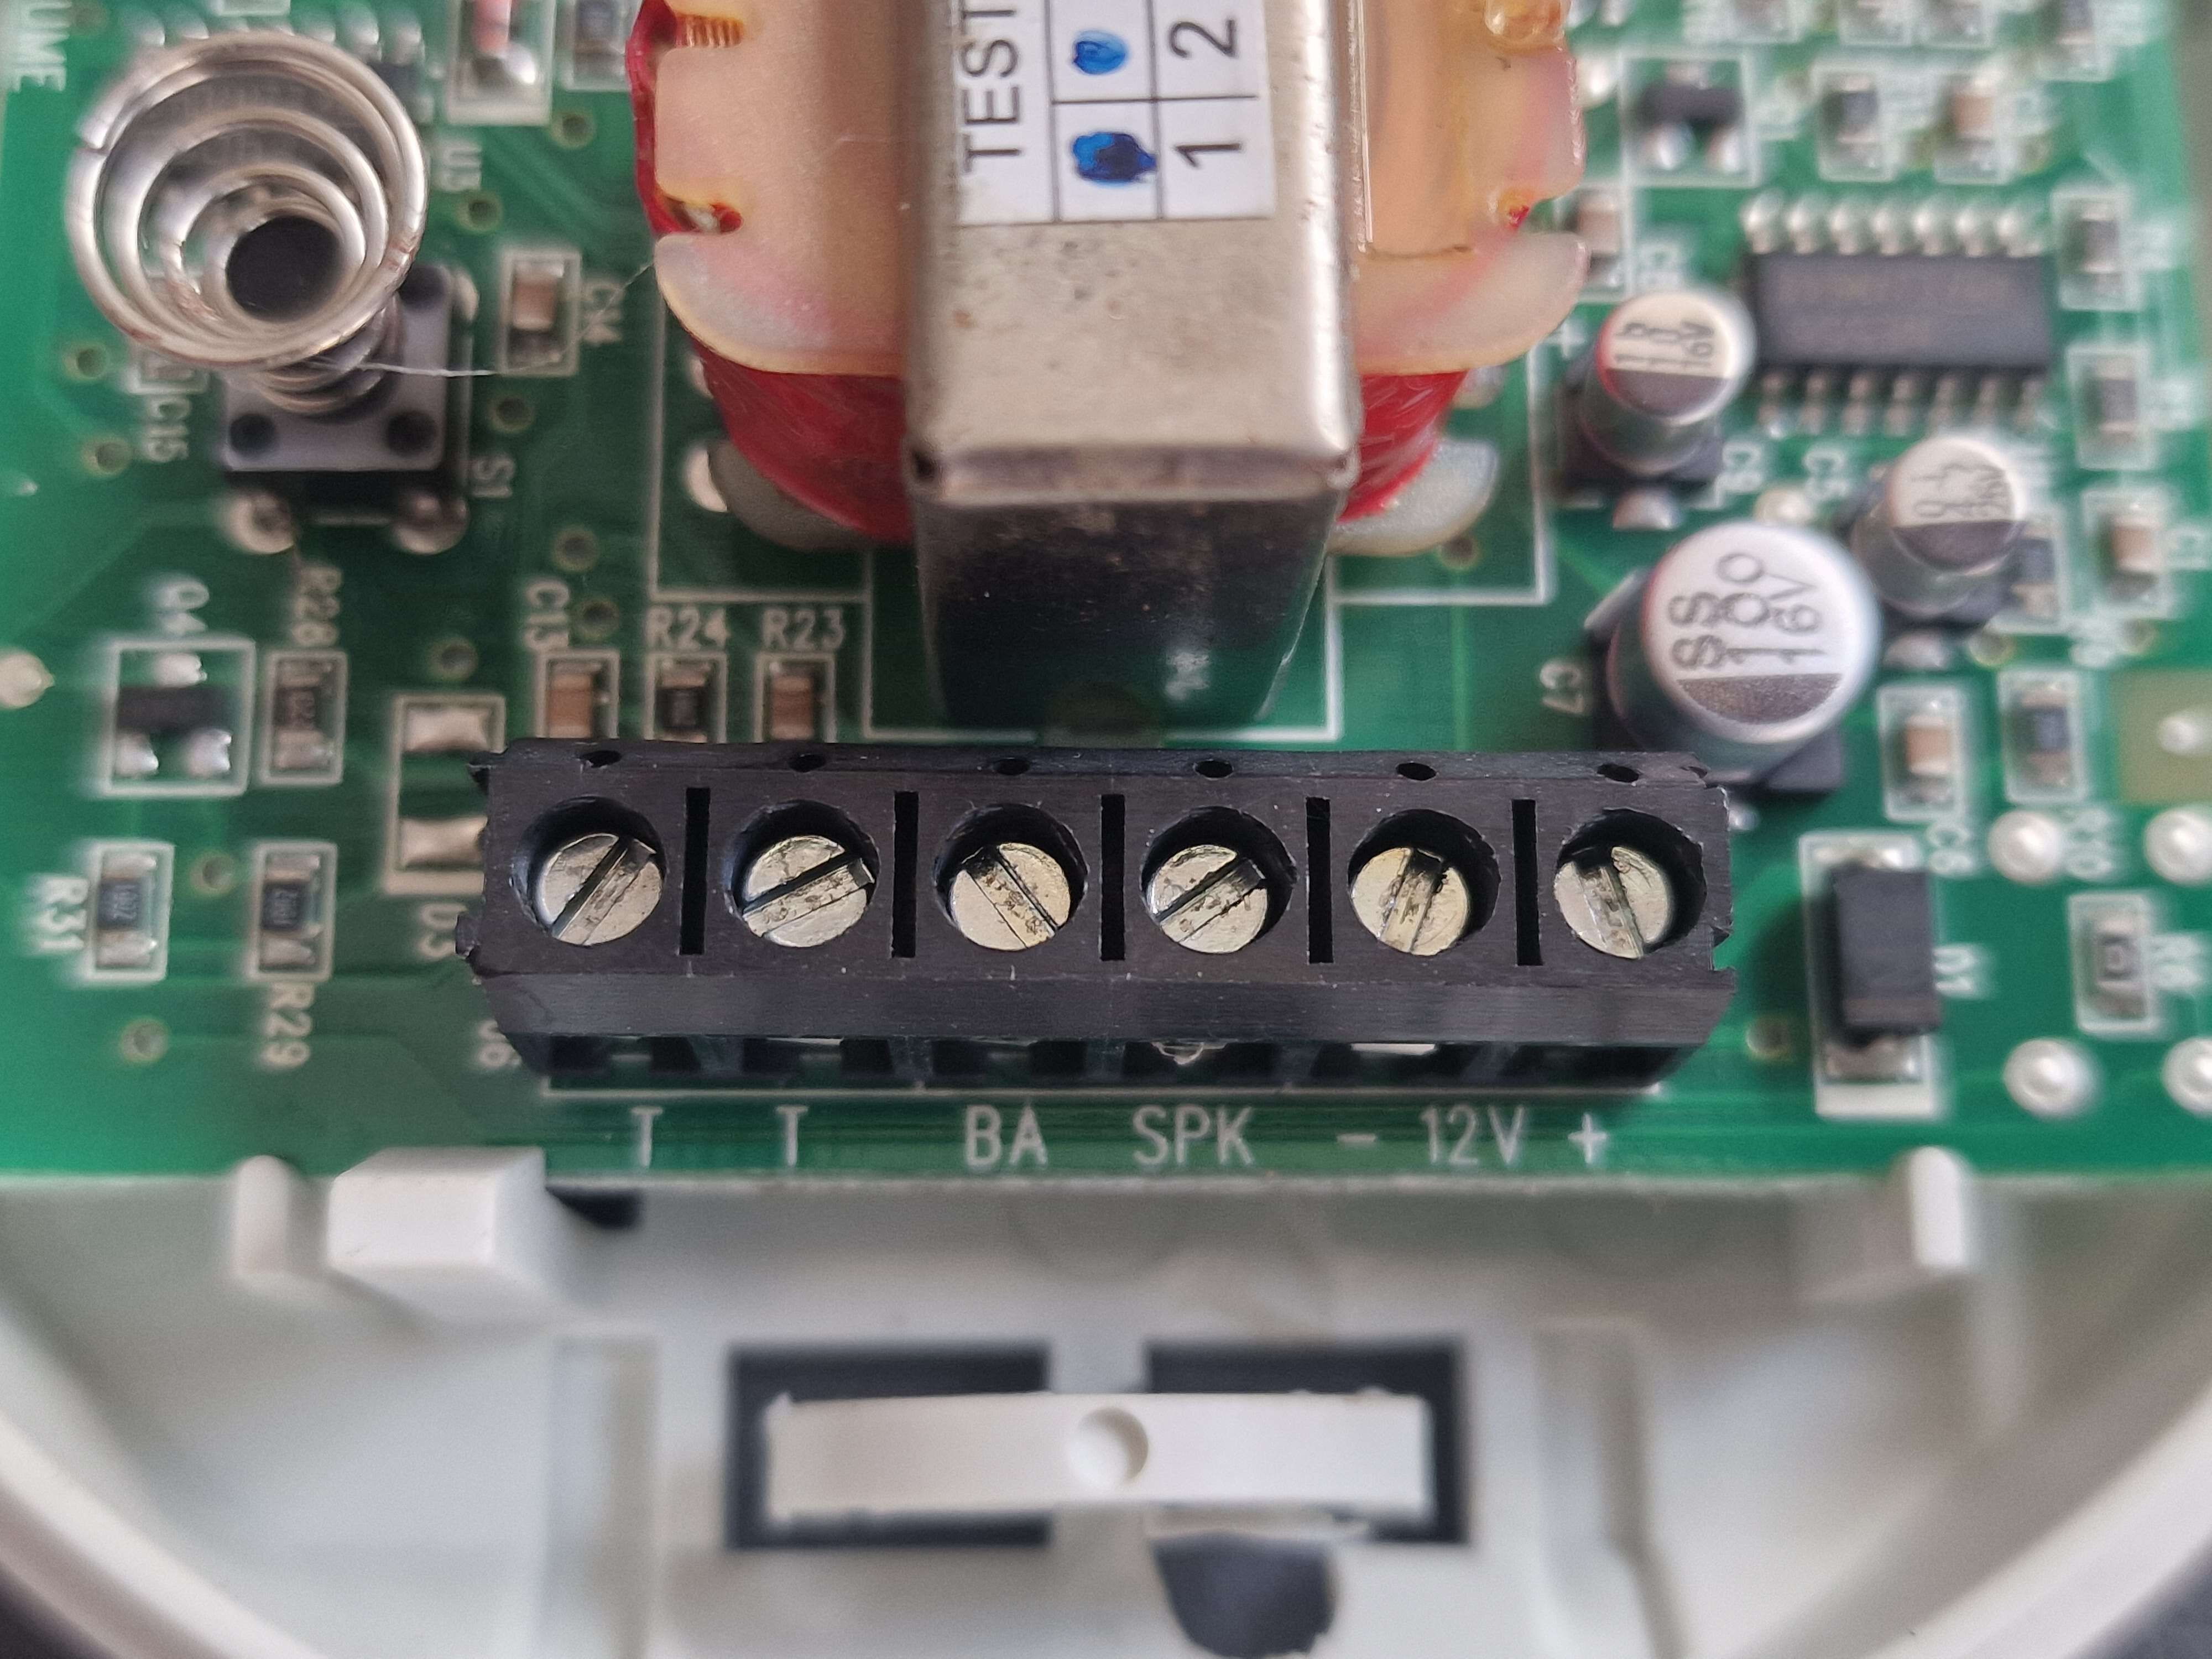
Good evening all. Requesting a little help from the good folk of the security installer. I have a pair of Pyronix internal twin alert speaker / sounder units that I'd like to wire into the above mentioned Texecom Premier 24 control panel. I've attached a couple of pictures showing both the speaker / sounder connections and the control panel connections. If some kind person would kindly give me the correct wiring connections between the two it'd be much appreciated. Thank you and regards, Dave.

-
Another Premier Elite Question.
Dave Walton replied to Dave Walton's topic in !!..DIY Installers..!!
Ah......I see......, thank you.... So guard access covers both options.... As a DIY'er I haven't really much experience of a panel that has as many programming options as this has and thus I'm very grateful for the help and advice offered from the good folk on here. Your help in sorting this out for me is much appreciated. Regards, Dave. -
Another Premier Elite Question.
Dave Walton replied to Dave Walton's topic in !!..DIY Installers..!!
Thanks for the reply. Regarding the guard access, as far as I can make out this only allows you to pass through a zone on your way to the keypad once the entry timer has been tripped. The problem I'm having is that in part set (Going to bed) I require zones 1, 2, 3, 4, 5 and 8 (All of downstairs and upper rear bedroom windows) to be active, zone 7 (Landing) to be off and zone 6 (Stairs) to be timed. The idea being that we are able to move across the landing in the night to visit the bathroom and then when going downstairs in the morning the stairs sensor will trip the timer to remind certain individuals to disarm the system. The reason behind this is that on numerous occasions in the past these certain individuals would walk down the stairs, right past the keypad at the bottom of the said stairs and into the living room, thus triggering a full alarm and therefore awakening the whole house, by adding a sensor on the stairs that trips the timer, I hope to overcome this. (Although having known these certain individuals for quite some time, this is by no means a certainty........ !) As mentioned earlier, I can select the "Alter Part Arms" menu and select each zone to be on or off in part set, but on or off are the only options available for the zones in that menu, there are no other options like setting a zone to be timed or entry / exit. I've looked through all of the programming menus and cannot find anywhere that gives me an option to program zone 6 as timed or entry / exit when the system is part set. I'm certain that this can be done, it's just that I can't suss out how.......... So it's back over to the good folk on here to hopefully help me over the line with this one...... Regards, dave. -
Evening all. I have yet another question regarding my newly installed Premier Elite control panel. Question is, how do I program a particular zone to be timed when in part set ? I think I have managed to set the zones I want to be on or off when the system is part set, but I cannot find any option that allows me to program a zone as timed when part set, I can only find either on or off options. Regards, Dave.
-
Texecom Premier 24 Tamper Fault.
Dave Walton replied to Dave Walton's topic in !!..DIY Installers..!!
Thank you Mr Happy...... I have this morning programmed zones 1 to 8 as normally closed and am now able to use the alarm........ Your help has been much appreciated, thank you. Regards. -
Texecom Premier 24 Tamper Fault.
Dave Walton replied to Dave Walton's topic in !!..DIY Installers..!!
Thank you for your reply. I was leaning a little towards this being a set up / programming issue and my lack of experience with panels that have this degree of programming. (Why I'm firmly in the DIY installers forum !) If possible, would you be able to tell me the procedure that would remove this tamper fault problem ? Unfortunately I don't have a installation / programming manual so any help with this would be very much appreciated. Regards. -
Good evening all. I've just finished installing the above mentioned control panel at home as my aged ADE Optima 2 Plus was becoming more trouble that it was worth to keep it alive. (As the good folk on here told me many times it was !) I've wired all 8 zones up with a mix of PIR's and magnetic door switches, powered the panel up (Whilst loading the factory defaults) and I'm getting a tamper fault that won't clear on all 8 zones. I've wired the tamper for all 8 zones in a series loop as there are only one pair of tamper terminal connections on the PCB, the fault wouldn't clear although I checked the tamper loop for continuity as I added each connection so knew it to be good, I powered the panel down, removed the tamper loop wiring and just linked the pair of tamper terminal PCB connections together to see if the panel would work as it should, however upon powering the panel back up, I'm still getting the tamper fault on all 8 zones and it still will not clear, hence me turning to the many knowledgeable members of the security installer in the hope of finding an answer........ Any help / advice with this would be much appreciated. Regards, Dave Walton.
-
Thank you, this is most helpful.........
-
Thank you..... As you've mentioned aux voltage, I'd like to provide a little more information. There is a block of six terminals grouped together on the circuit board all related to power, two for the connection from the transformer, they measure 18.34 VAC, two for the battery connections, they measure 14.27 VDC and finally two for the PIR's etc, they measure 13.58 VDC Hope the above are more helpful regarding the working condition of the power supply. (If this changes nothing, no bother, at least you now have the full picture to work with) Regards.
-
Good afternoon. My comment stating 14.6V at the panel battery connections was intended as for information for the more knowledgeable on here to perhaps tell me one way or the other if the panel is working correctly, and not in any way that, in my opinion, this area of the panel was ok. (Hence the reason I'm in the DIY installers forum !) From your reply I would assume that the PSU is actually not working correctly, if this is so I'd appreciate it if you could perhaps elaborate a little so that I could better understand this issue and therefore learn something. I'm always grateful to anyone whom is more knowledgeable about these things than me that takes the time to reply in an effort to help / assist. Regards, Dave Walton.
-
I have removed the old battery and plan to replace it once I've finished doing the few little alterations I hope to make. Checked the voltage at the panel outputs for the battery and was getting 14.6 V. Regards.
-
If you could look for me, it'd be much appreciated...... Regards.