_2d2230.png)
_5a42ce.png)

saguy
Member
-
Joined
-
Last visited
Everything posted by saguy
-
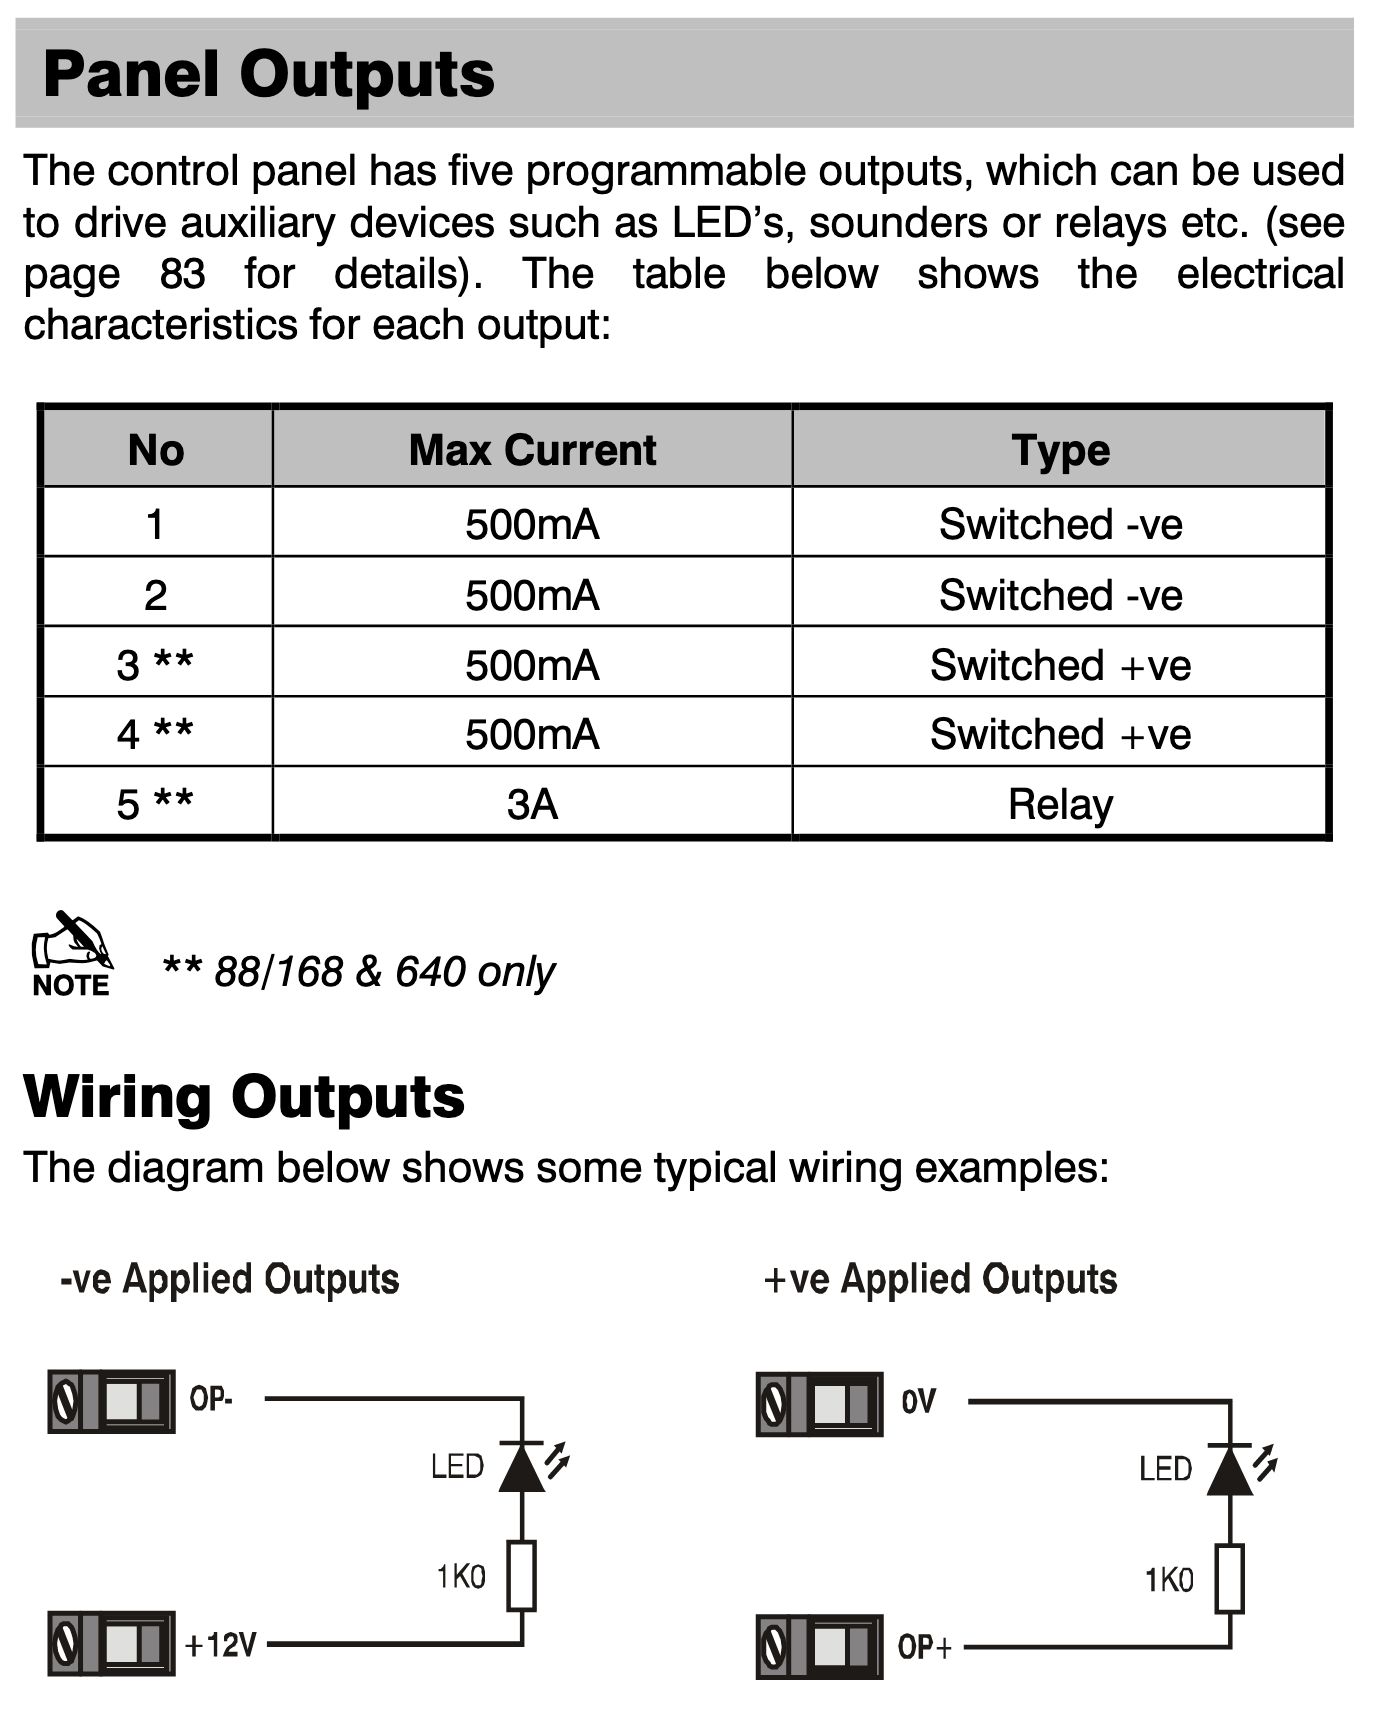
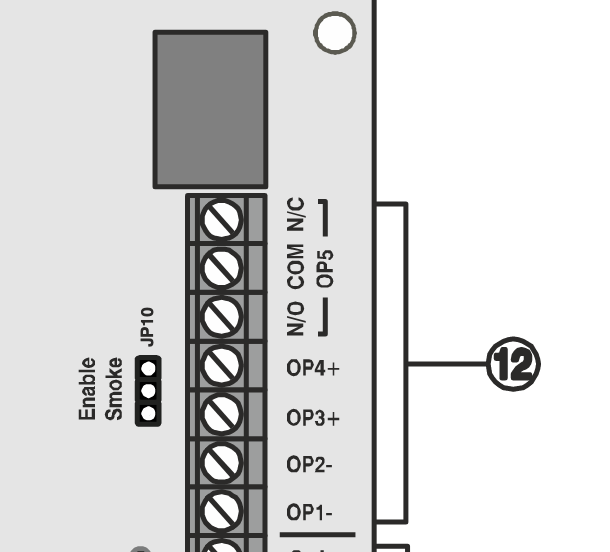
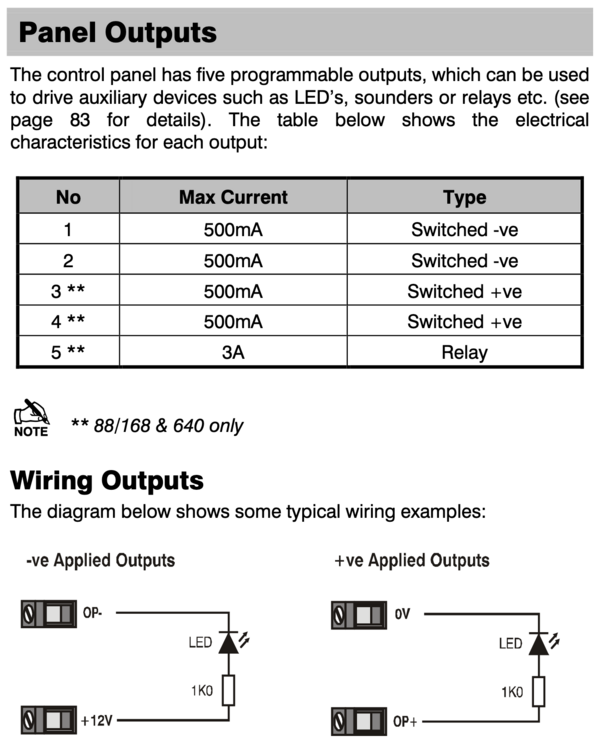
Looking at the other side of the board I have the following panel outputs: The manual says: And this is my LED: Am I to understand then that the correct way to wire this would be? LED +'ve to 1k0 resistor to 12V+ from panel LED -'ve to OP1-
-
Thank you, and you raise good points. I'm not in the UK, I'm from South Africa. This is by far the best alarm forum I've found so hopefully I can stick around. I double checked, my LED is definitely 12V. I'll have a look at how to program the Panel Outputs for this LED.
-
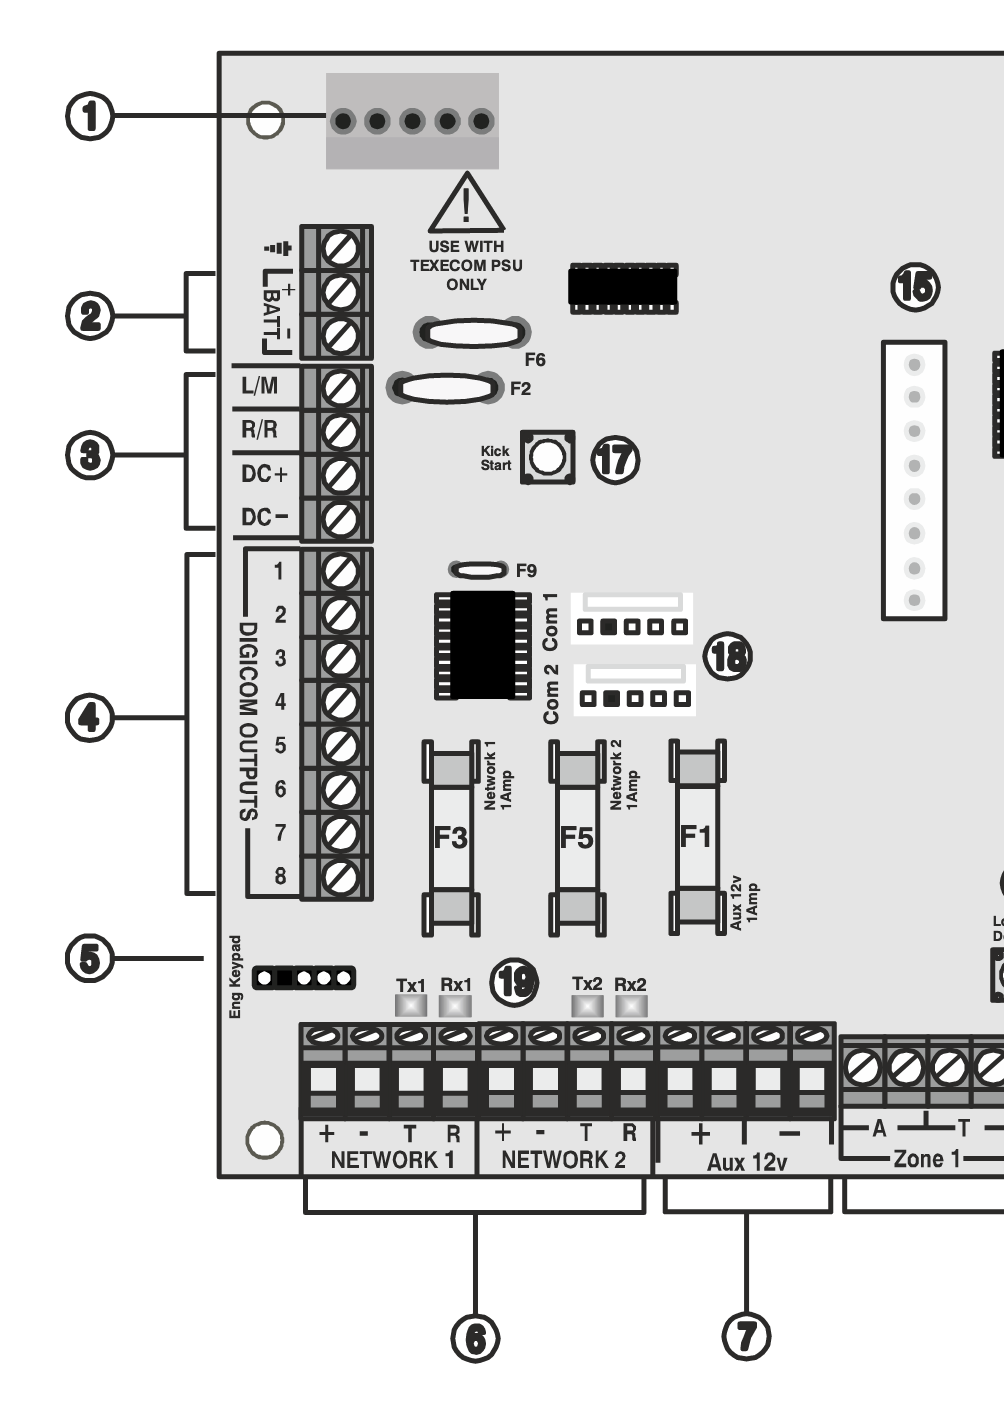
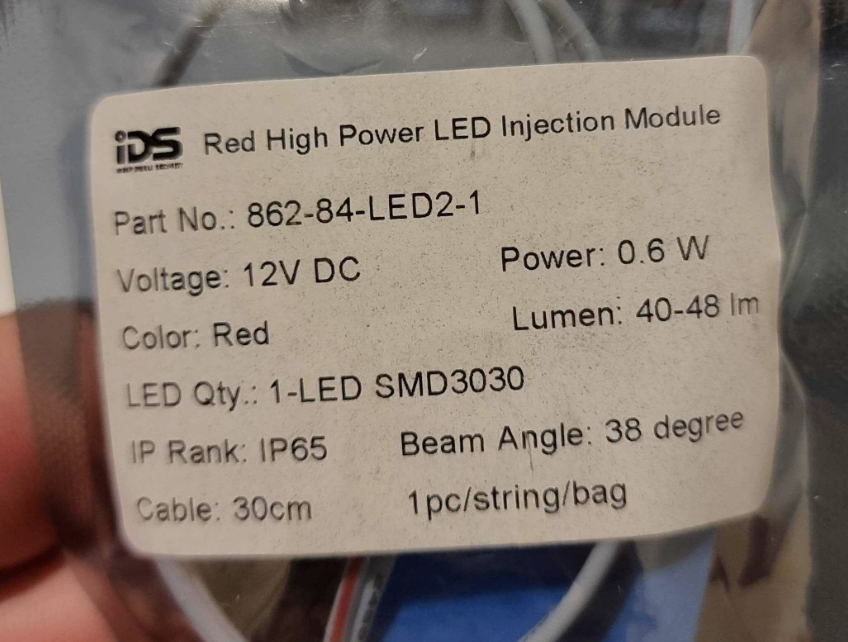
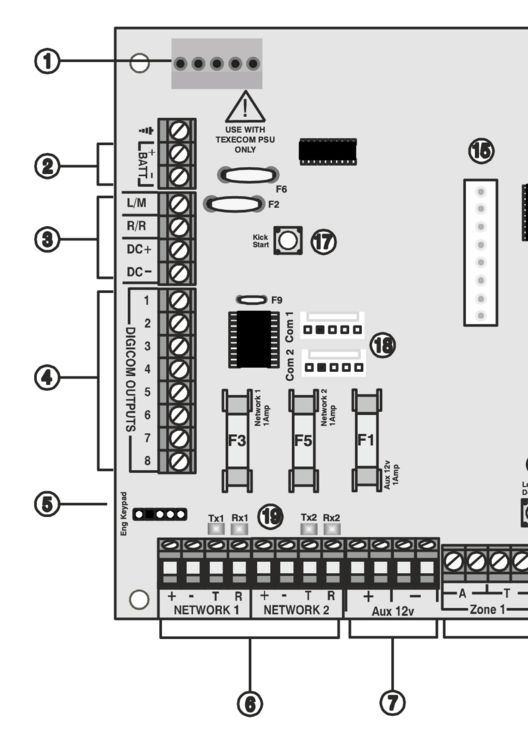
Thank you in advance for the great assistance always given on this forum. On my Texecom Elite 168 I have a blue status LED outside my house that indicates that my alarm is armed, or flashes if it was put into an alarm state. I asked my local installer to fit another LED inside my house to prevent false alarms by someone opening the door while the alarm is armed. The LED I bought was a red 12V DC LED (The red is easier on the eye at night) The local installed arrived, pulled the wire and then told me that it can't be done with my LED, you can't have a red and blue LED at the same time and they left. I don't know how to wire the LED, so I thought I'd take a look. When I look on the keypad I can see that DigiCom 6 output is set for Armed/Alarm. Looking at the alarm panel they connected the +'ve wire for the new LED to digicom 6 and -'ve to the battery. I tested the voltage when armed and saw that the new wire outputs 5v when armed. Not wanting to mess up my existing LED I set Digicom 7 to Armed/Alarm as well so I could play around there. I saw with my multimeter that if I connect -'ve to Digicom 7 and +'ve to "Aux 12V +" then when the alarm is armed my LED is on, and when alarm isn't armed my LED is off. I've attached a picture of the relevant section of my panel. While my setup works, is what I've done completely wrong? I don't quite understand how the digicom outputs work or how they switch, but what I've done works and the alarm seems to be functioning normally.
-
Thank you. I'm going to give it a go and set it to auto. If that doesn't work then I'll investigate further.
-
Thank you to everyone who previously assisted me with adding some QD-W indoor ricochet PIRs to my system. With the help received I managed to setup everything the way I (and more importantly, my wife) wanted. I do appear to have one issue though - and maybe I've missed something: My new QD-W's show as zones being active for long after I've left the room. Which wouldn't bother me too much, but it appears to be hindering my ability to arm the alarm when leaving. When trying to set my alarm with my remote control, often nothing will happen - and then I have to wait a minute and try again, before it eventually works. My guess is that it's the QD-W's showing as active even though I had left the room for a minute or two already. As per docs and suggestions here I have the mode set to Hybrid, and I'm wandering if that doesn't have something to do with it. I would rather deal with changing batteries every year if it means the statuses are updated more frequently (if that is indeed the cause) Any help would be much appreciated. Thank you all the way from South Africa.
-
Oh... hahaha... don't be silly. It's connected directly to a hatch which releases a 2 litre coke and kfc to bribe the police to provide assistance.
-
Thanks for that. I'm still learning and appreciate the info. What makes T2 special then? Is it just that if it is "triggered" the alarm will show it as a tamper? What is an Uzi?
-
Thanks. Could one theoretically use M, S and T1 together? I see nothing that says otherwise in the manual.
-
Hello. I have two use cases for the SC-W contact/shock sensor. 1. Using shock sensor and magnetic sensor on my skylights to alarm when skylights are open or attempted break-in. My understanding is that the dip switches are: M - ON, S - On, T1 - Off, T2 - Off. 2. Using the inputs on the SC-W to connect my normally closed perspex burglar bars which essential have a wire running through them to determine if it's been cut. I imaging that one end of the wire goes to T1 terminal and the other to COM. Then dip switches are: M - Off, S - Off, T1 - On, T2 - Off. Then I'm also not sure what the correct mode would be, Hybrid/Auto? etc... Anyone have experience or guidance on this?
-
I haven't seen any techs wearing a T, but they maybe that's more for larger companies and not residential. Given that the large portion of our armed response security have bought their gun licenses (and lack even the most basic firearm competency), I think it's more likely the armed response meant to shoot someone the next town over and hit your tech friend by mistake ?
-
Well thanks for the help everyone, I managed to get the PIR in and all working fine. Also installed Wintex so I can fix all the spelling errors and inconsistencies a lot easier I see a lot of strange things though in Wintex, example - for the exact same PIRs in adjacent rooms a good few settings are different for no reason - and other things where rooms in the middle of the house are marked as Entry/Exit. Some of my Ricochet external td-w beams also require that I put in my engineer code every time they are triggered into an alarmed state, I can't clear them with a normal user reset. The one installer told me that's impossible, even though I showed him a video of exactly that. Although I'm a tad nervous messing around in Wintex. I see Texecom has free installer workshops, I may just attend those and upskill. As some of you guessed, I'm not in the UK. I'm in South Africa. Any of you fine installers want to come to SA and actually show our locals how it's done?
-
Sorry, I must apologise... really put my foot in it. Was frustrated with my local installers and with my inability to rectify the issues. Not trying to save money, literally just trying to get my system working the way I want it. When my local installers leave I'm left with spelling errors, sensors in incorrect zones and part arms setup incorrectly. Then when I changed installers they undid everything and made it worse... At one stage I even had to get someone who works at Texecom directly to come to my house to fix up the installer's errors. One of the installers had me replace half my system, only to find out later that there was no reason for me to do it. It's been frustrating, but my apologies for bringing that frustration here. Not trying to take the work out of installers hands, but sadly it's become a case of "if you want something done right, do it yourself" when it comes to my local installers and Texecom products. Thank you, I will test this.
-
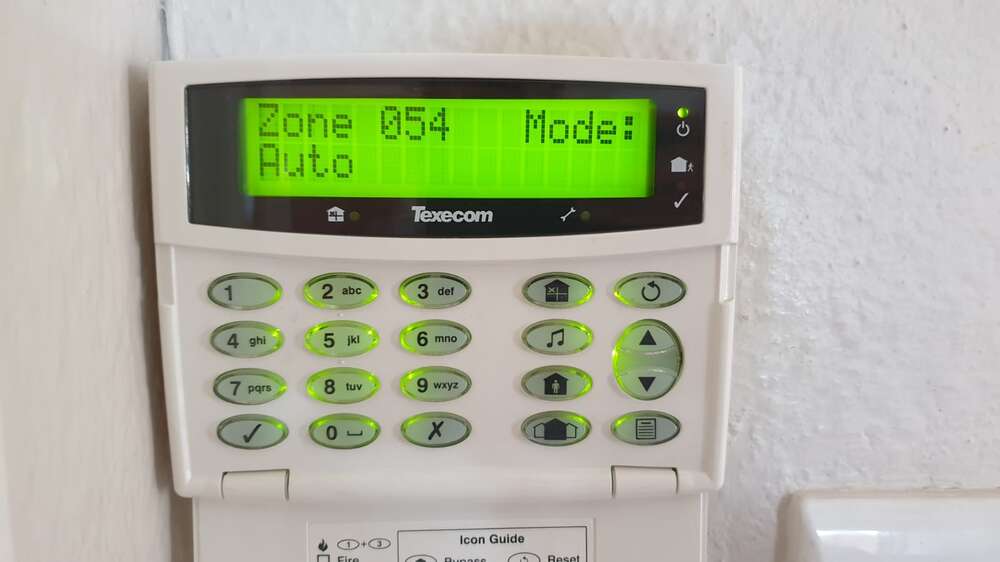
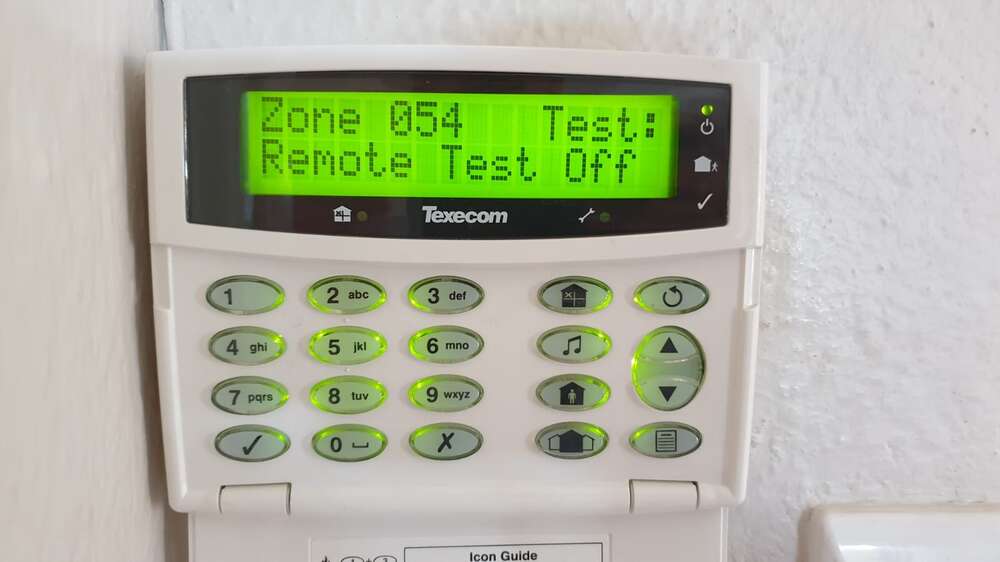
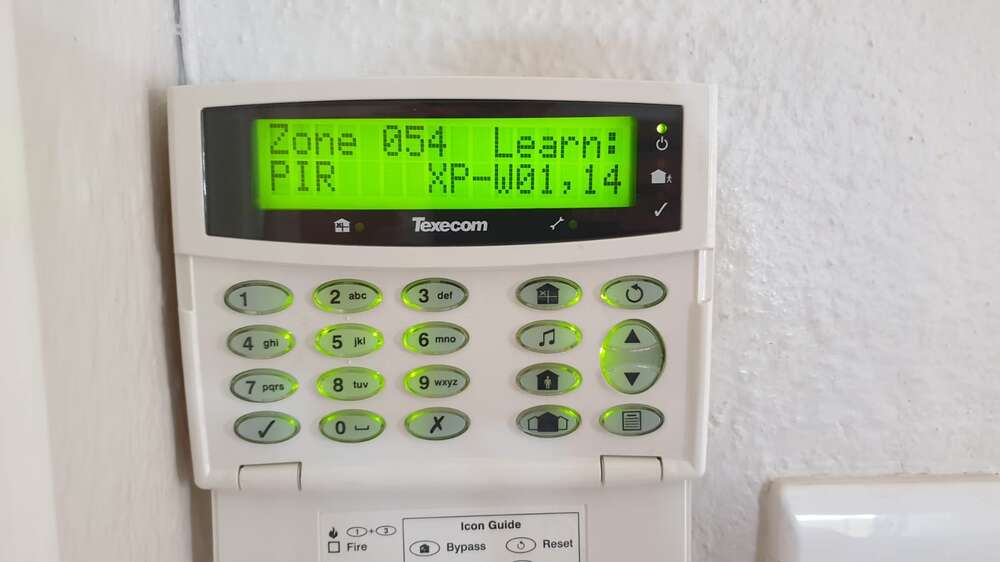
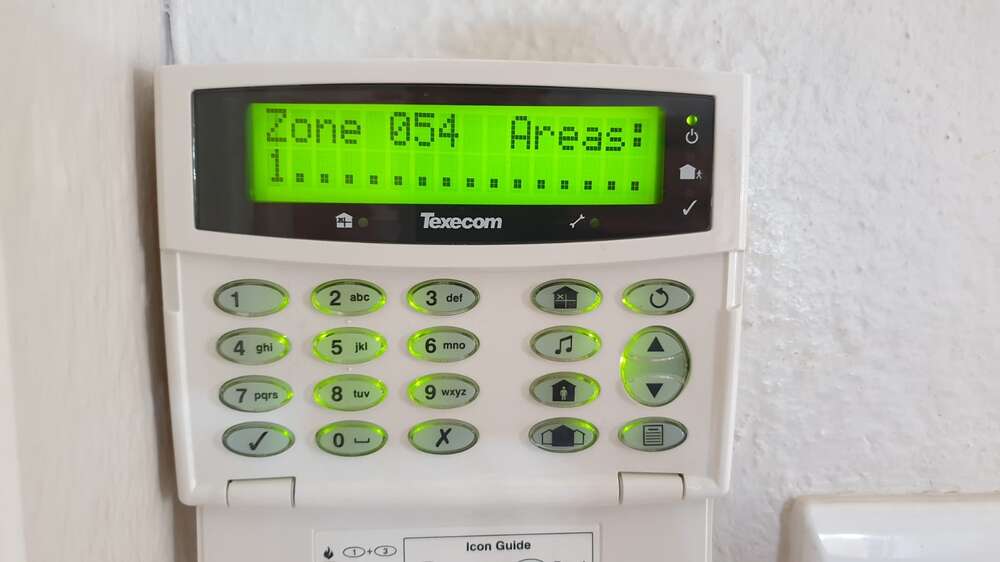
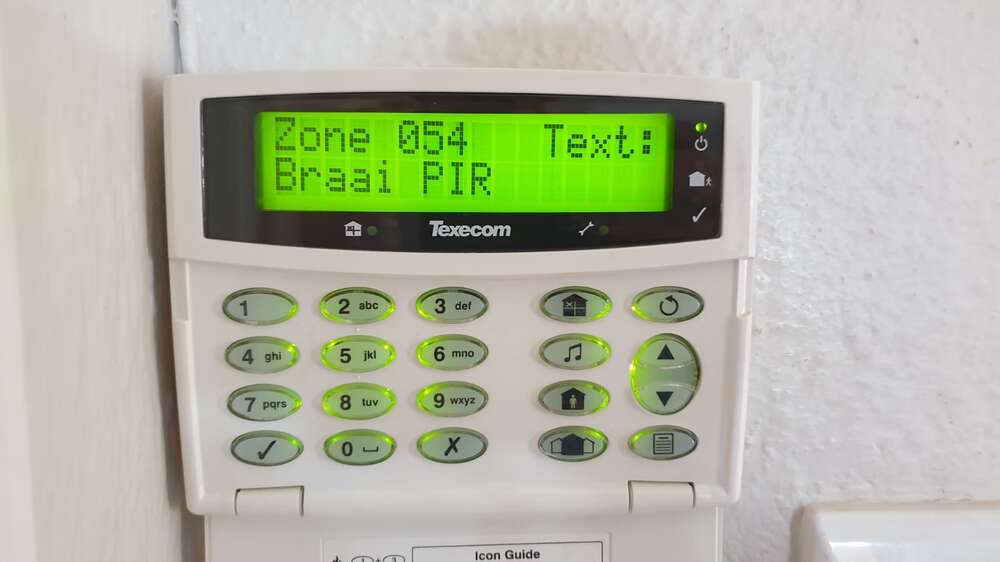
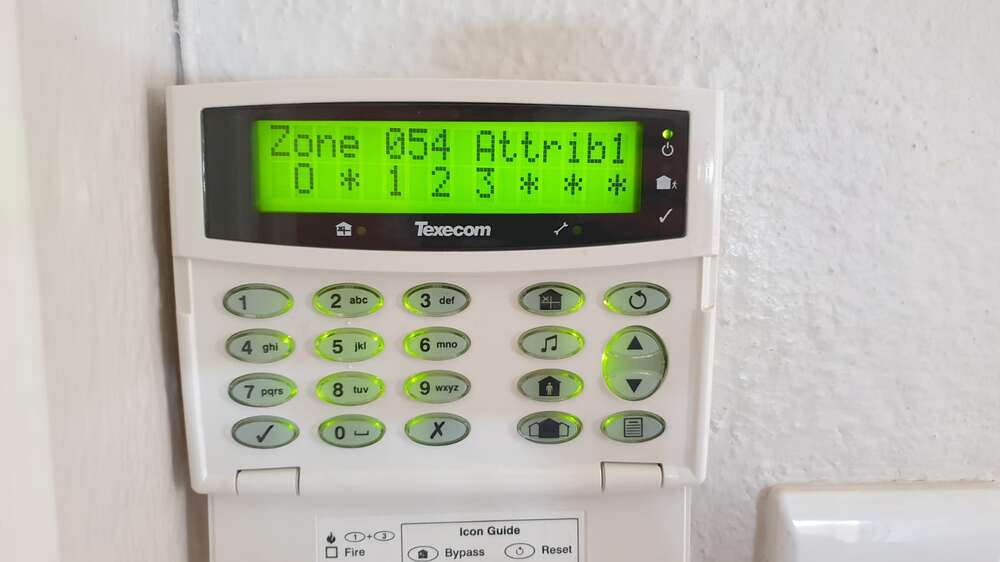
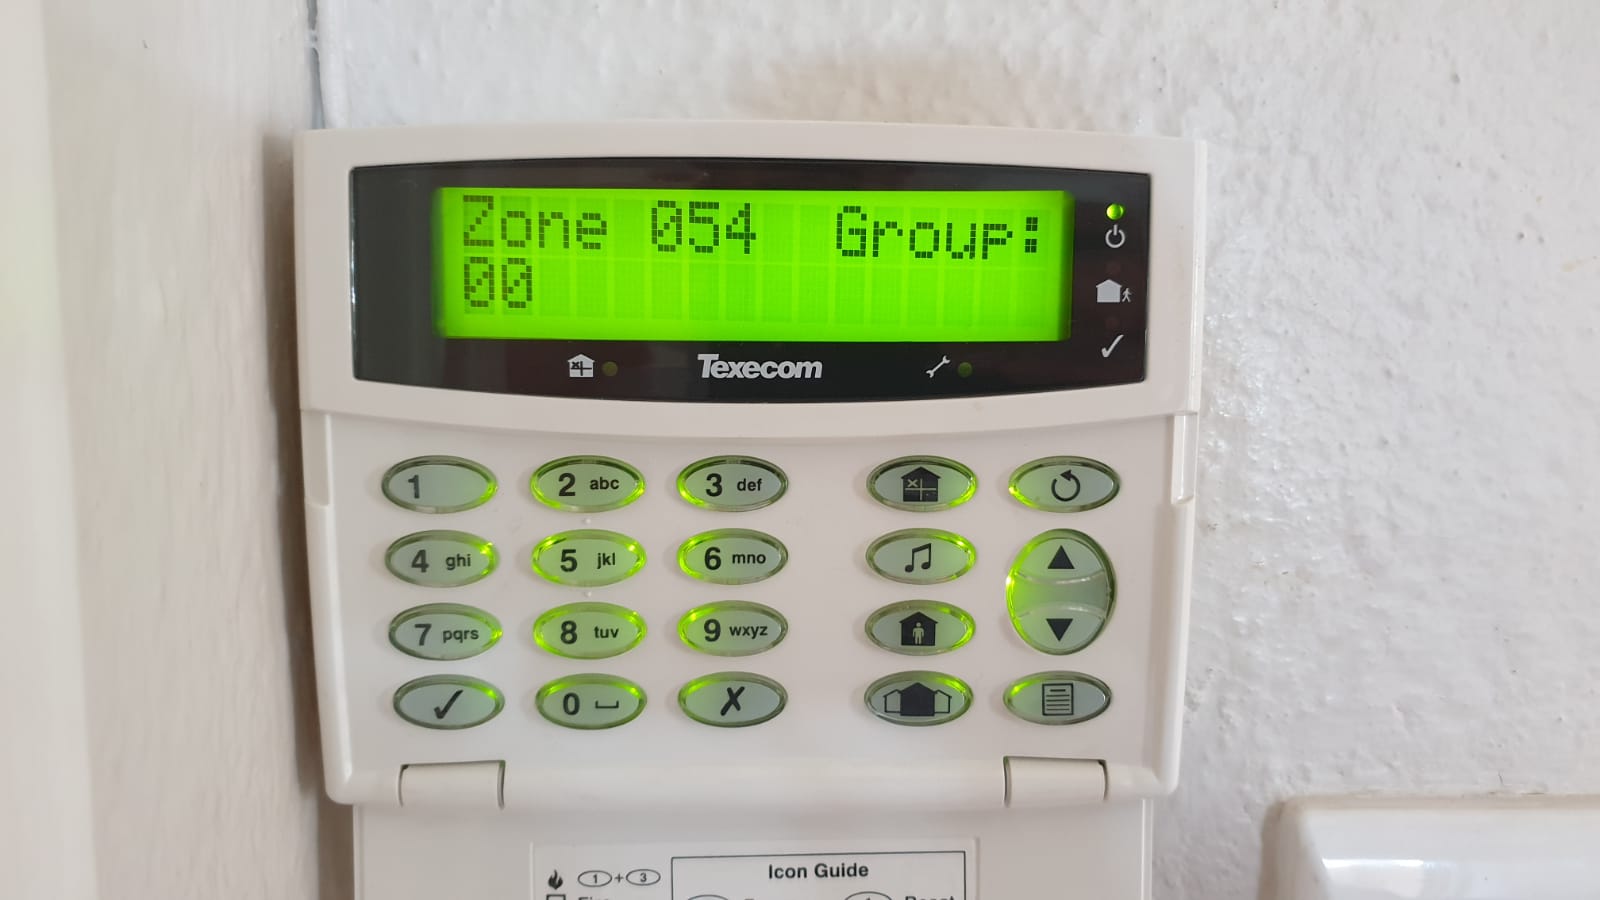
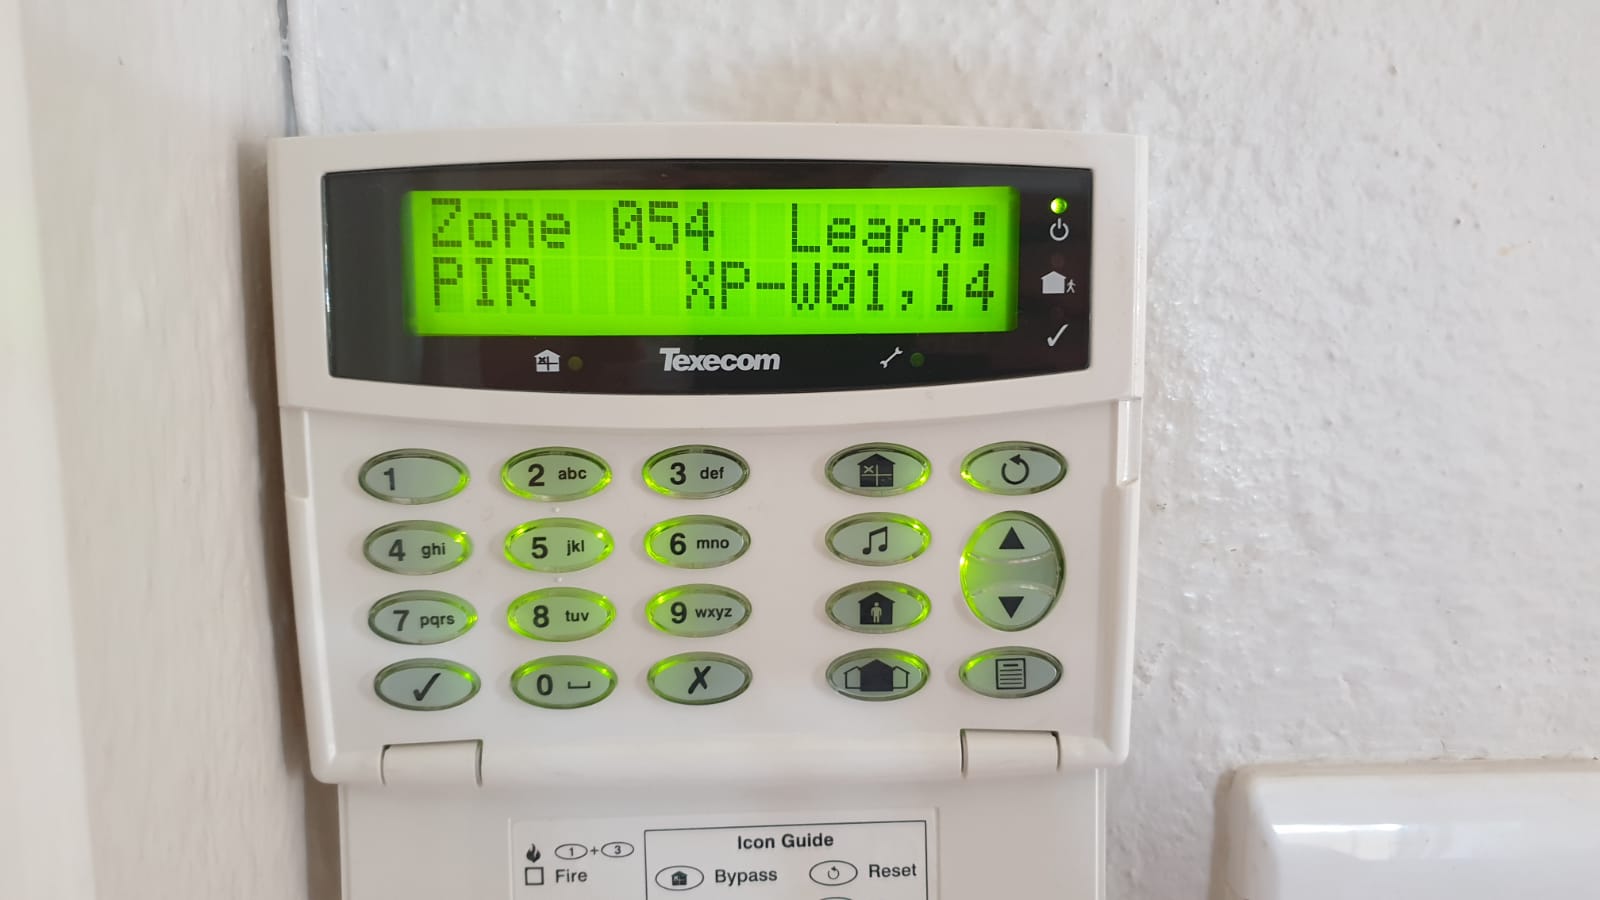
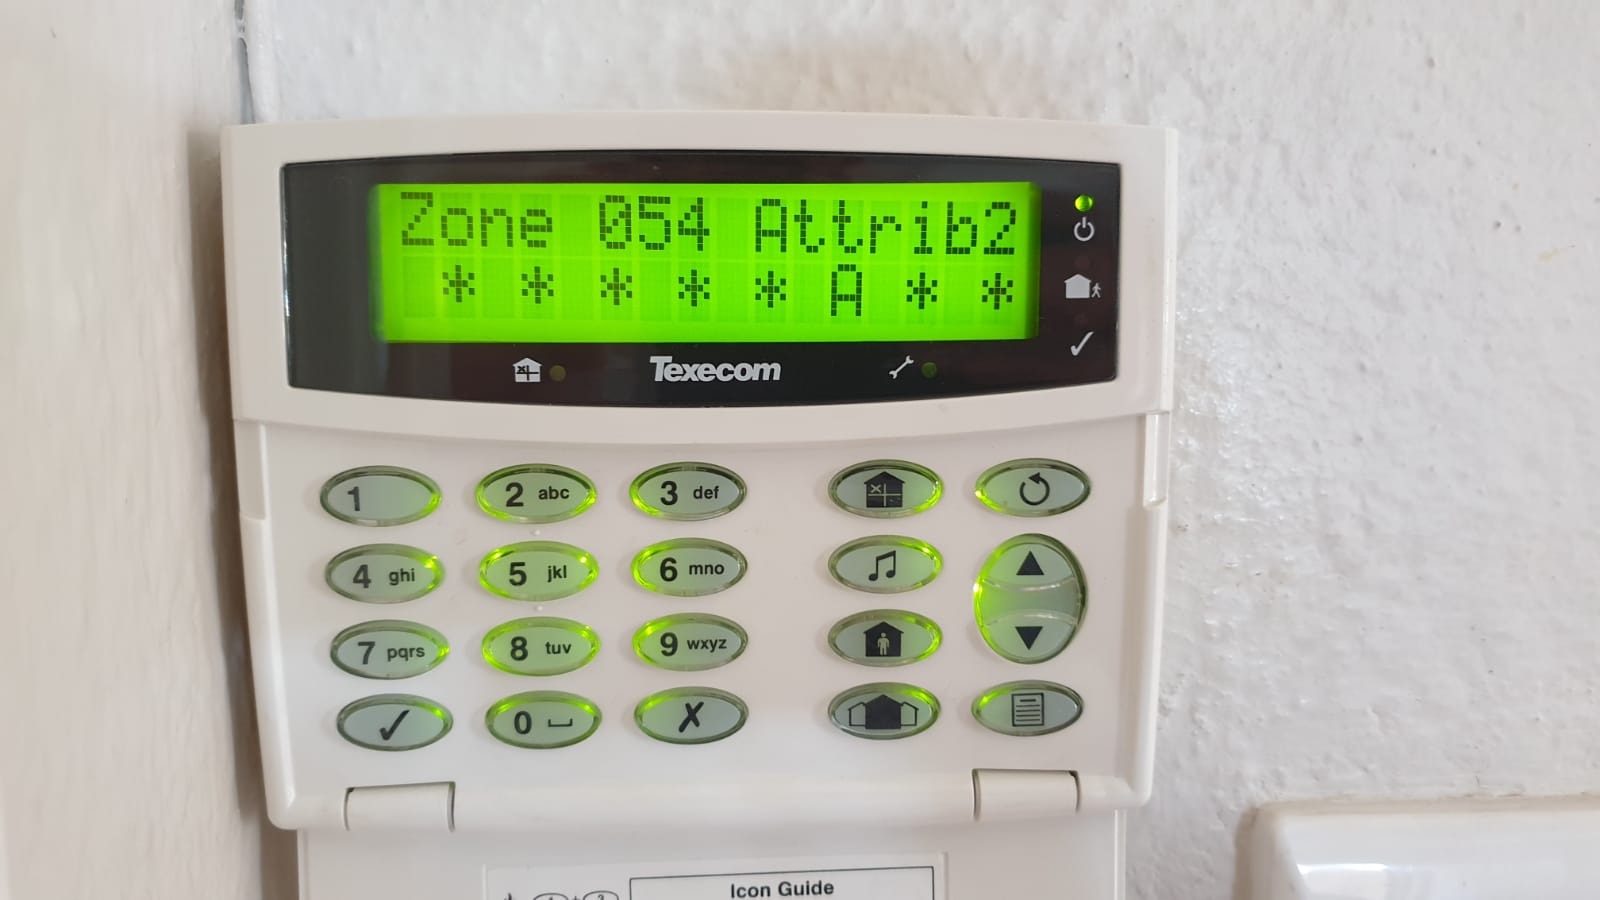
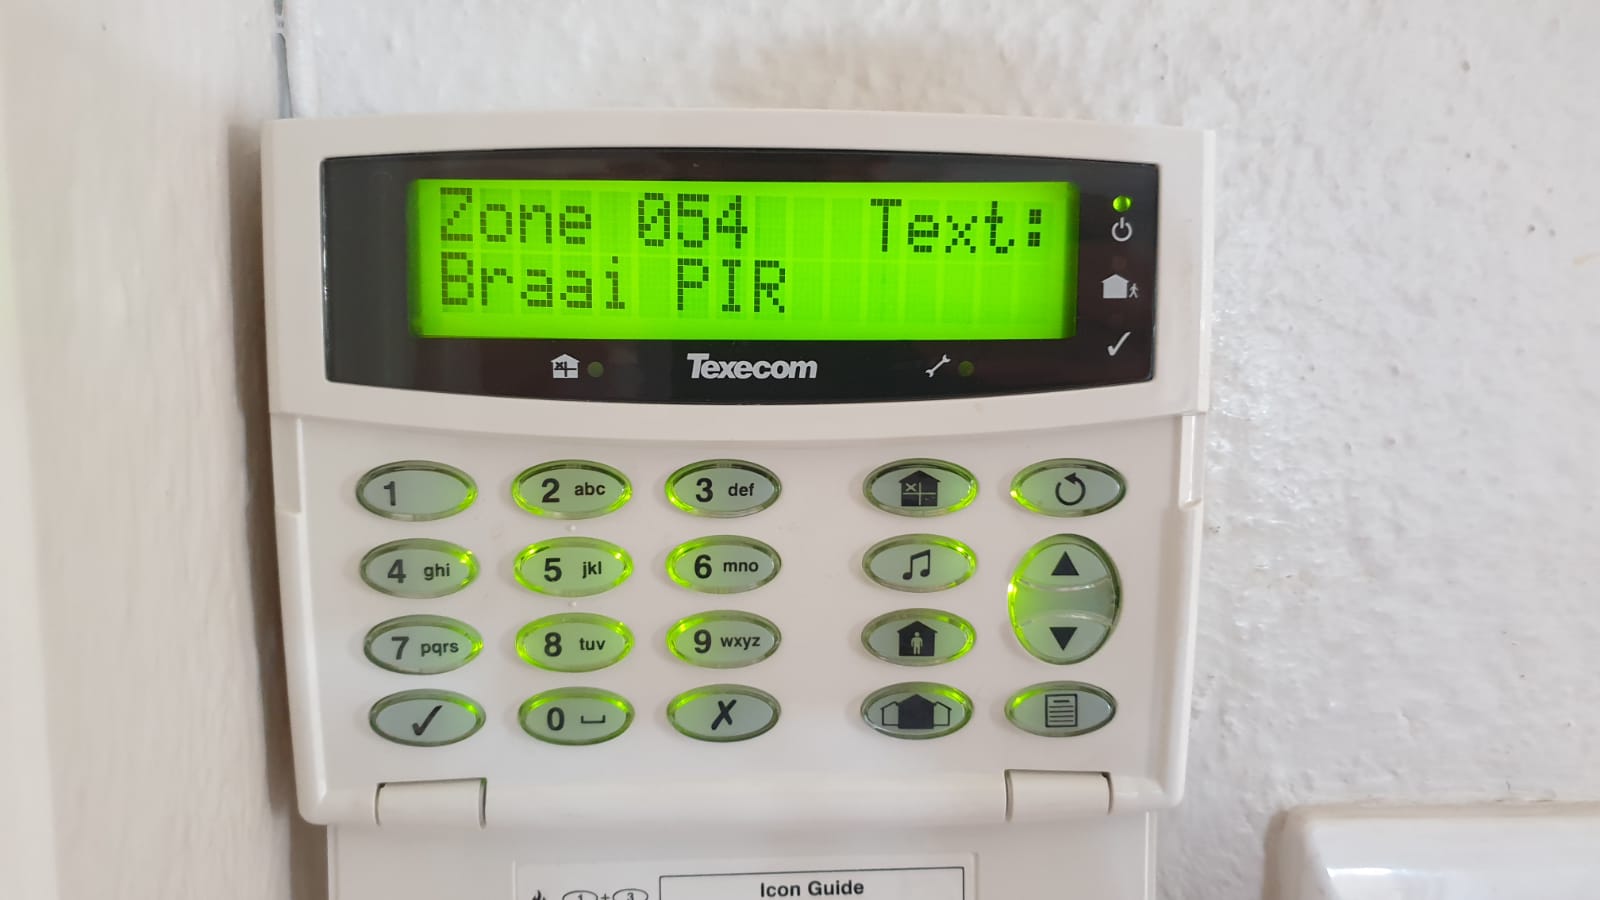
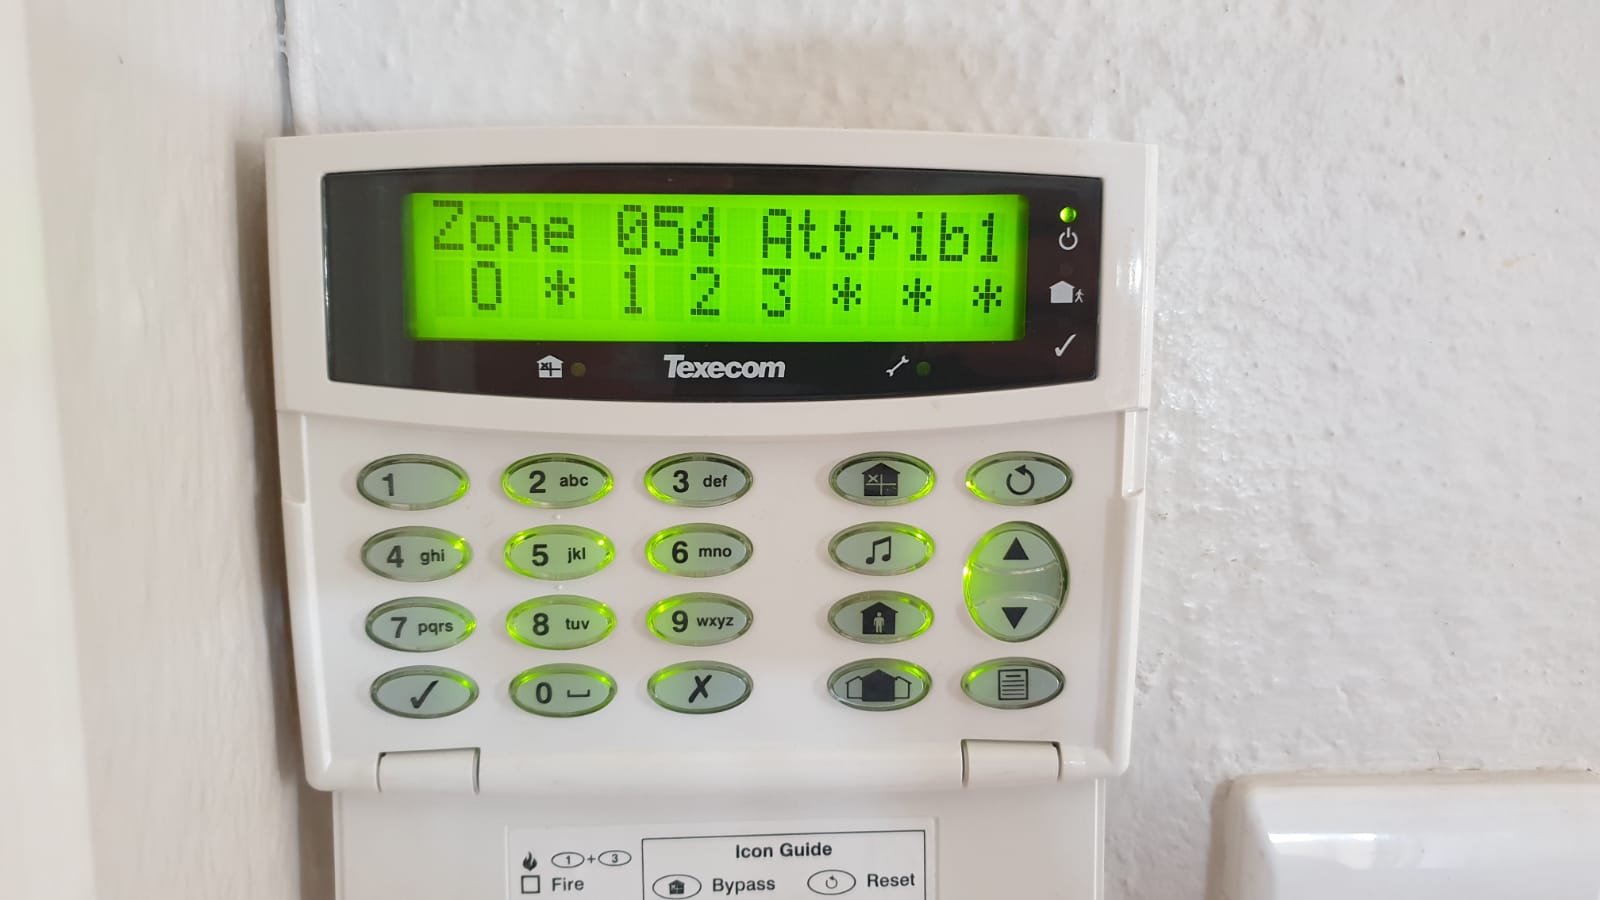
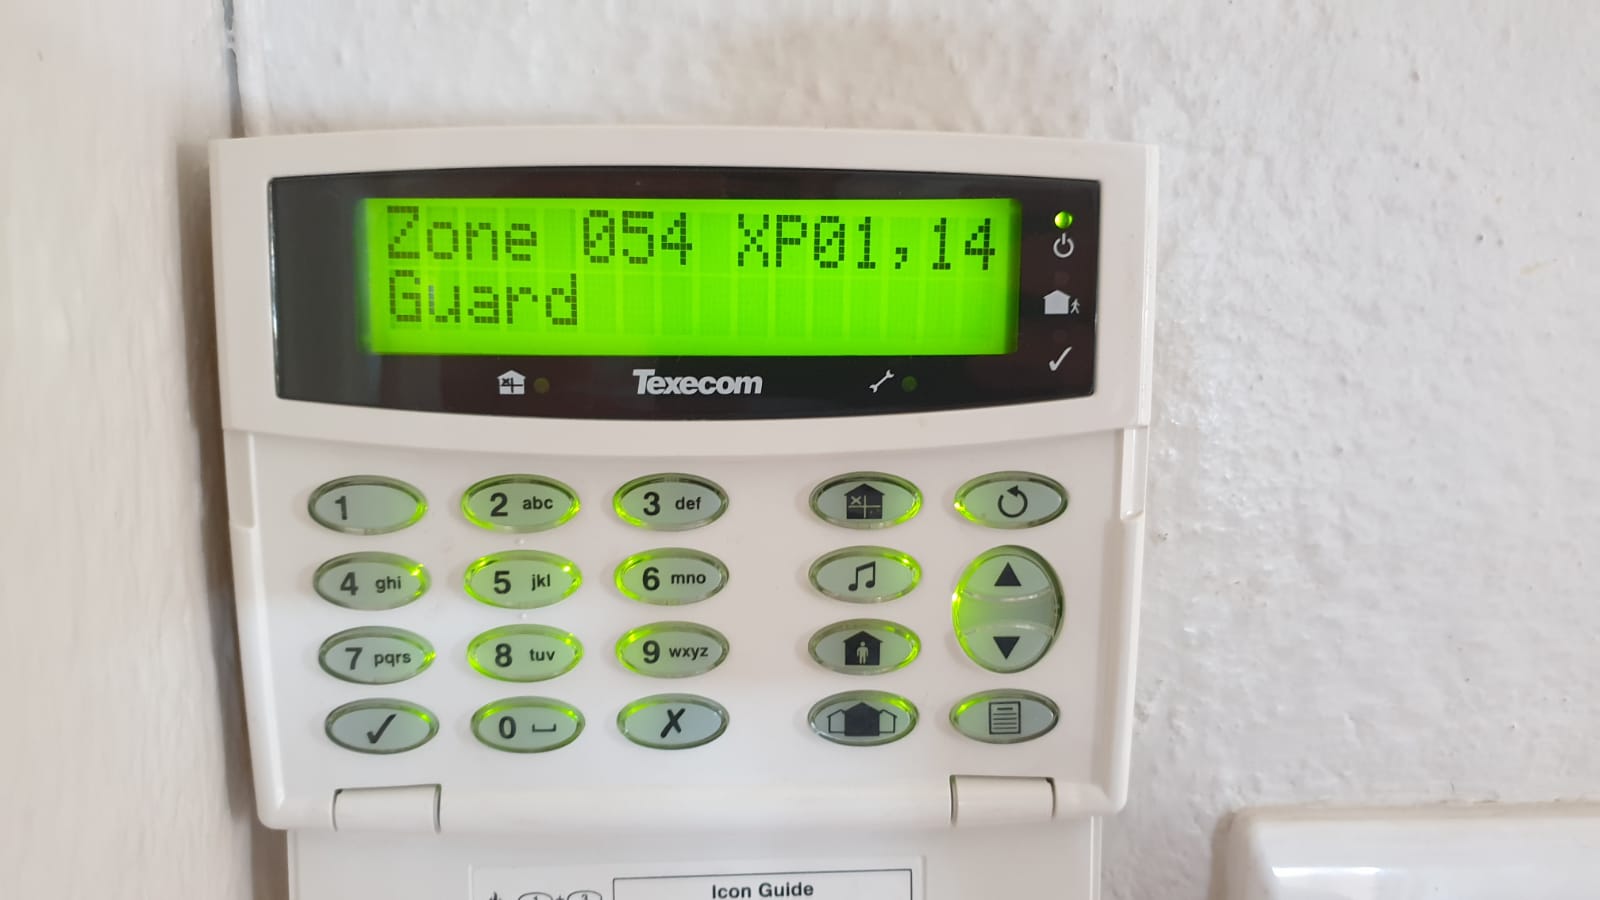
Hello. First time poster here. I'm getting annoyed with installers never doing exactly what I want, so trying to learn to do this myself. I have a new QD-W indoor ricochet PIR. I followed this video to add it: https://www.youtube.com/watch?v=vMFKPf77VVM It seems to have gone well as I have been able to see the following: - A tamper alarm for the zone when I was busy installing the PIR - When doing a walk test for area 1 the zone is picked up when I walk through it. Due to the location of this zone it is omitted from all part arms and should only be armed when I do a full arm on area 1. I tried setting my alarm now and walking into the room, but my alarm is not triggered. Other than the omit zones, all the other settings appear to be exactly the same as another one of my zones. Attached are screenshots of the zone setup, what am I missing to get this zone to trigger my alarm when fully armed: