

Muttsnutts
-
Posts
13 -
Joined
-
Last visited
Content Type
Profiles
Forums
Events
Downloads
Gallery
Blogs
Posts posted by Muttsnutts
-
-
26 minutes ago, james.wilson said:
agreed, normans point is the lid fixing screw (not the pcb screw) will be against the ceiling unless its upside down?
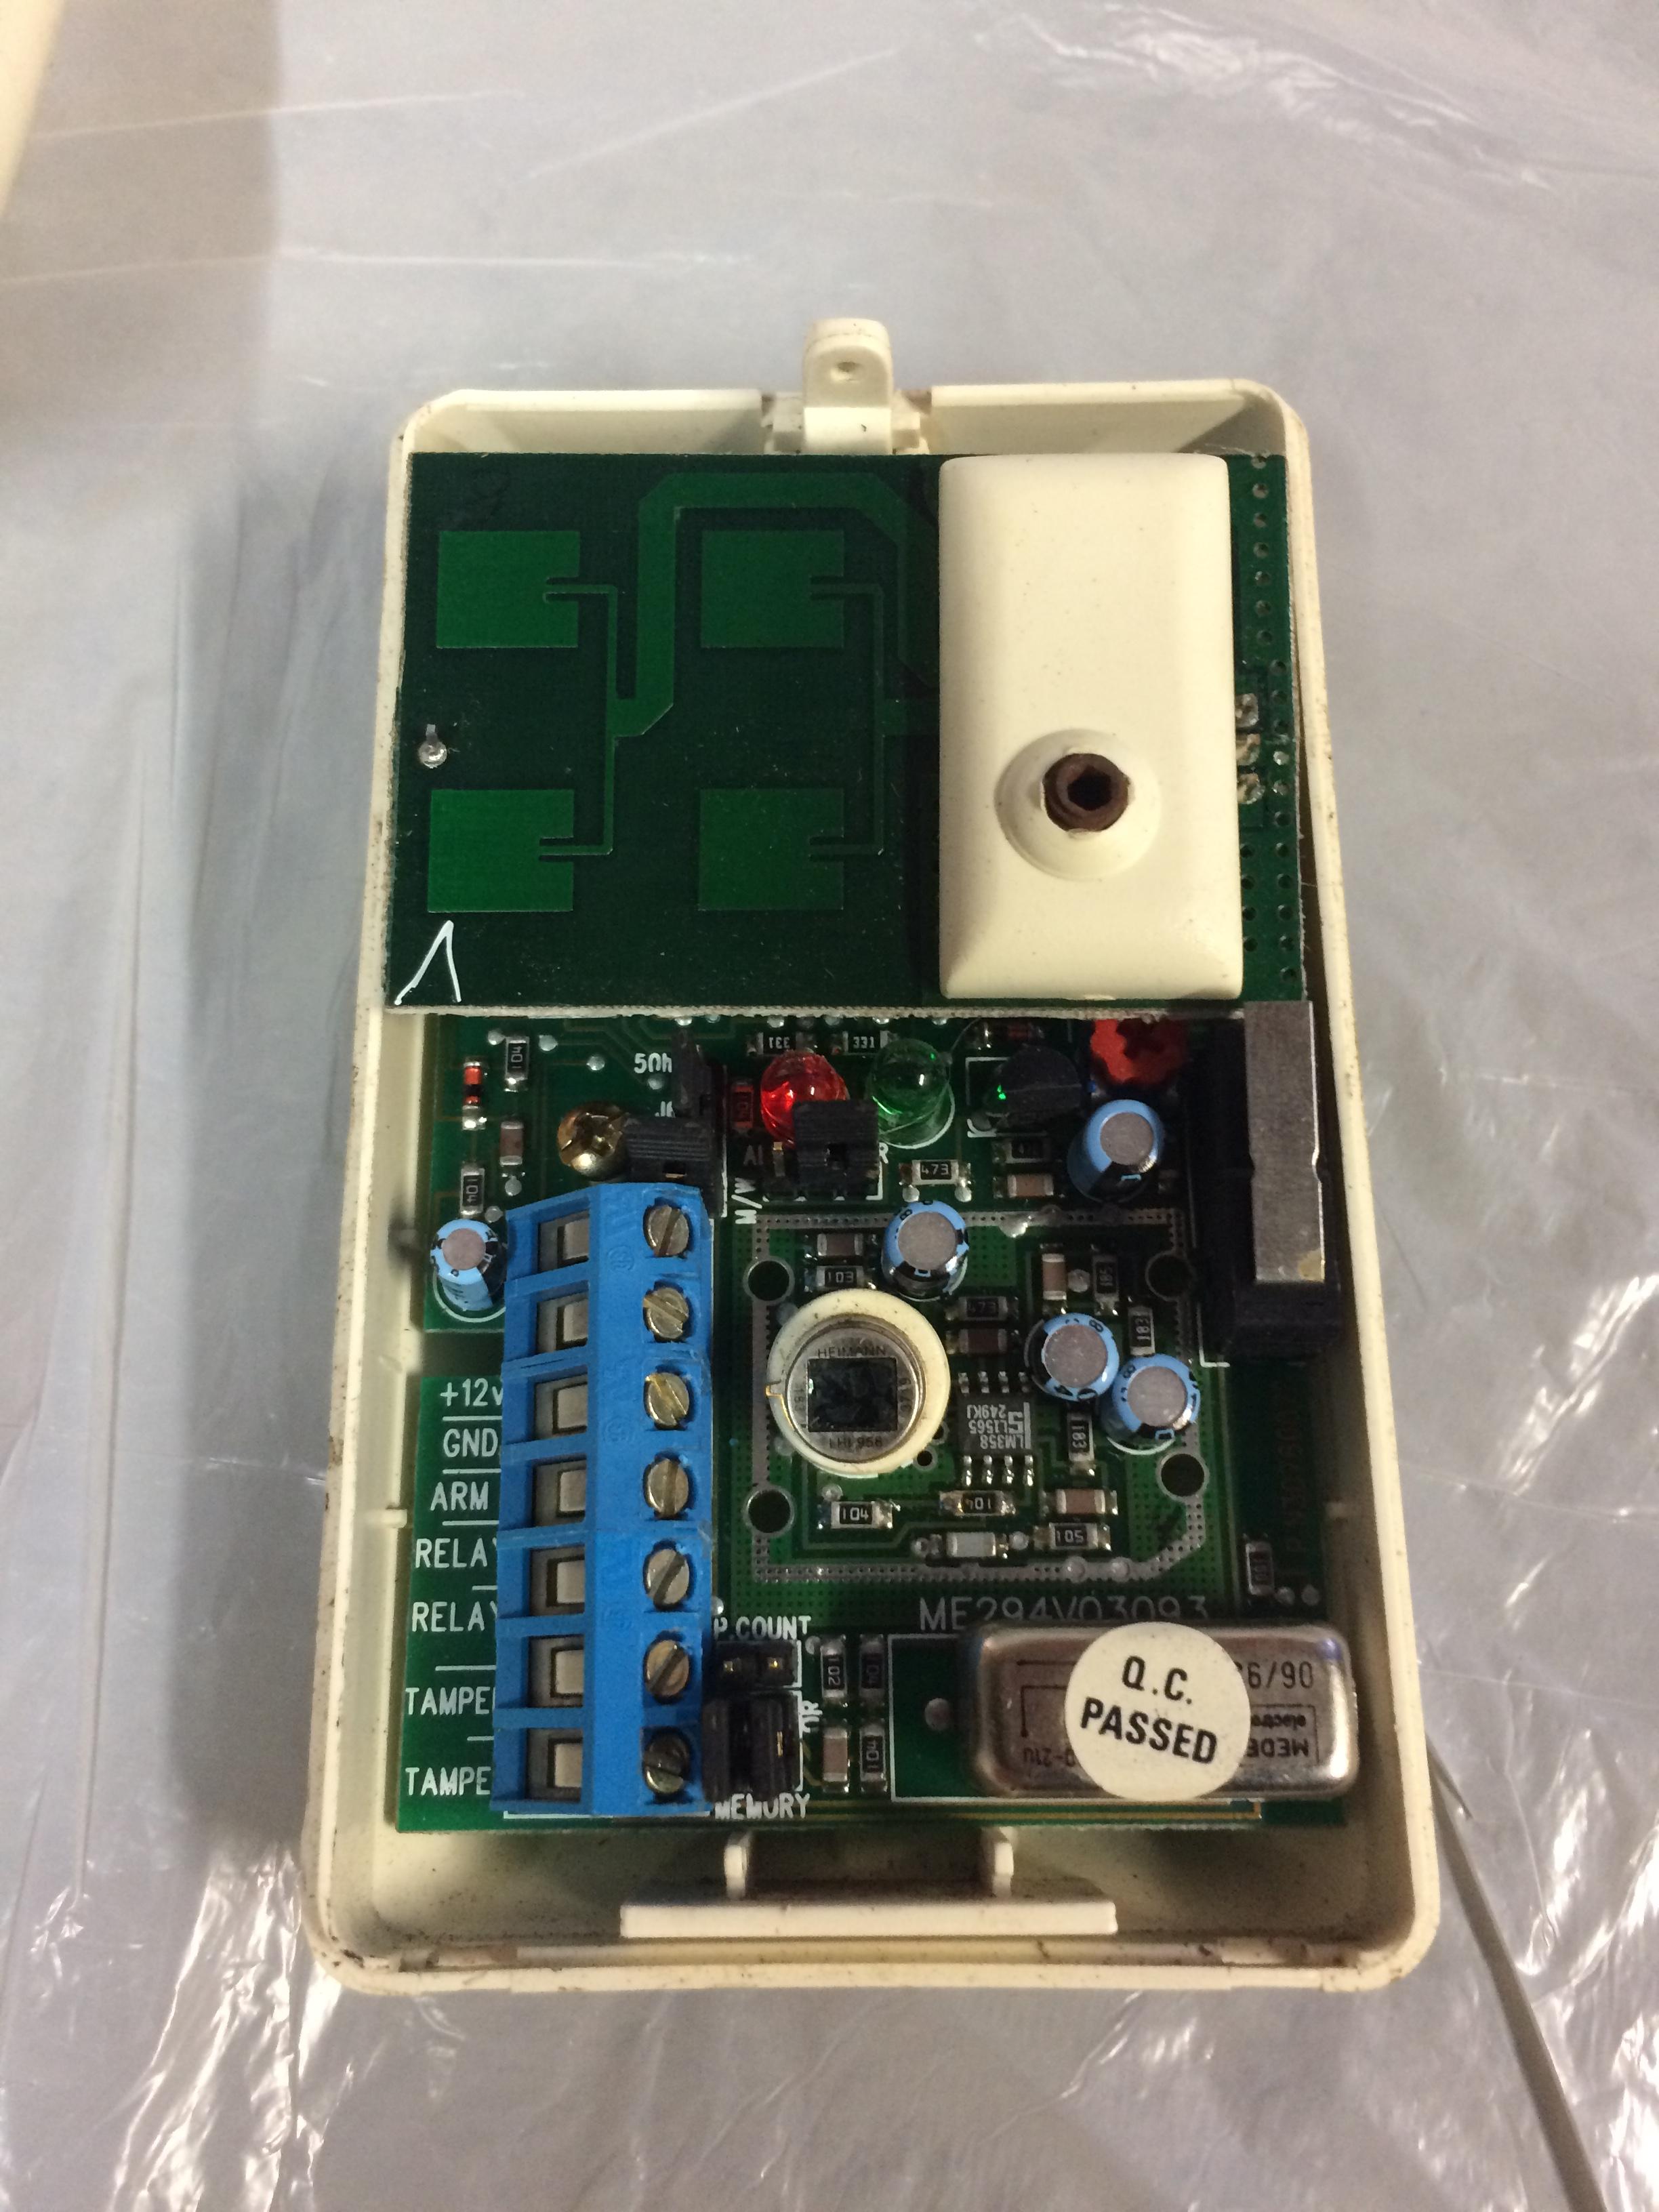
No there is no lid fixing screw ! There is a special tool to release cover ifs against celing, like one in pic ....

-
 1
1
-
-
You Deffo have to remove the small pcb screw to fit it to a wall.
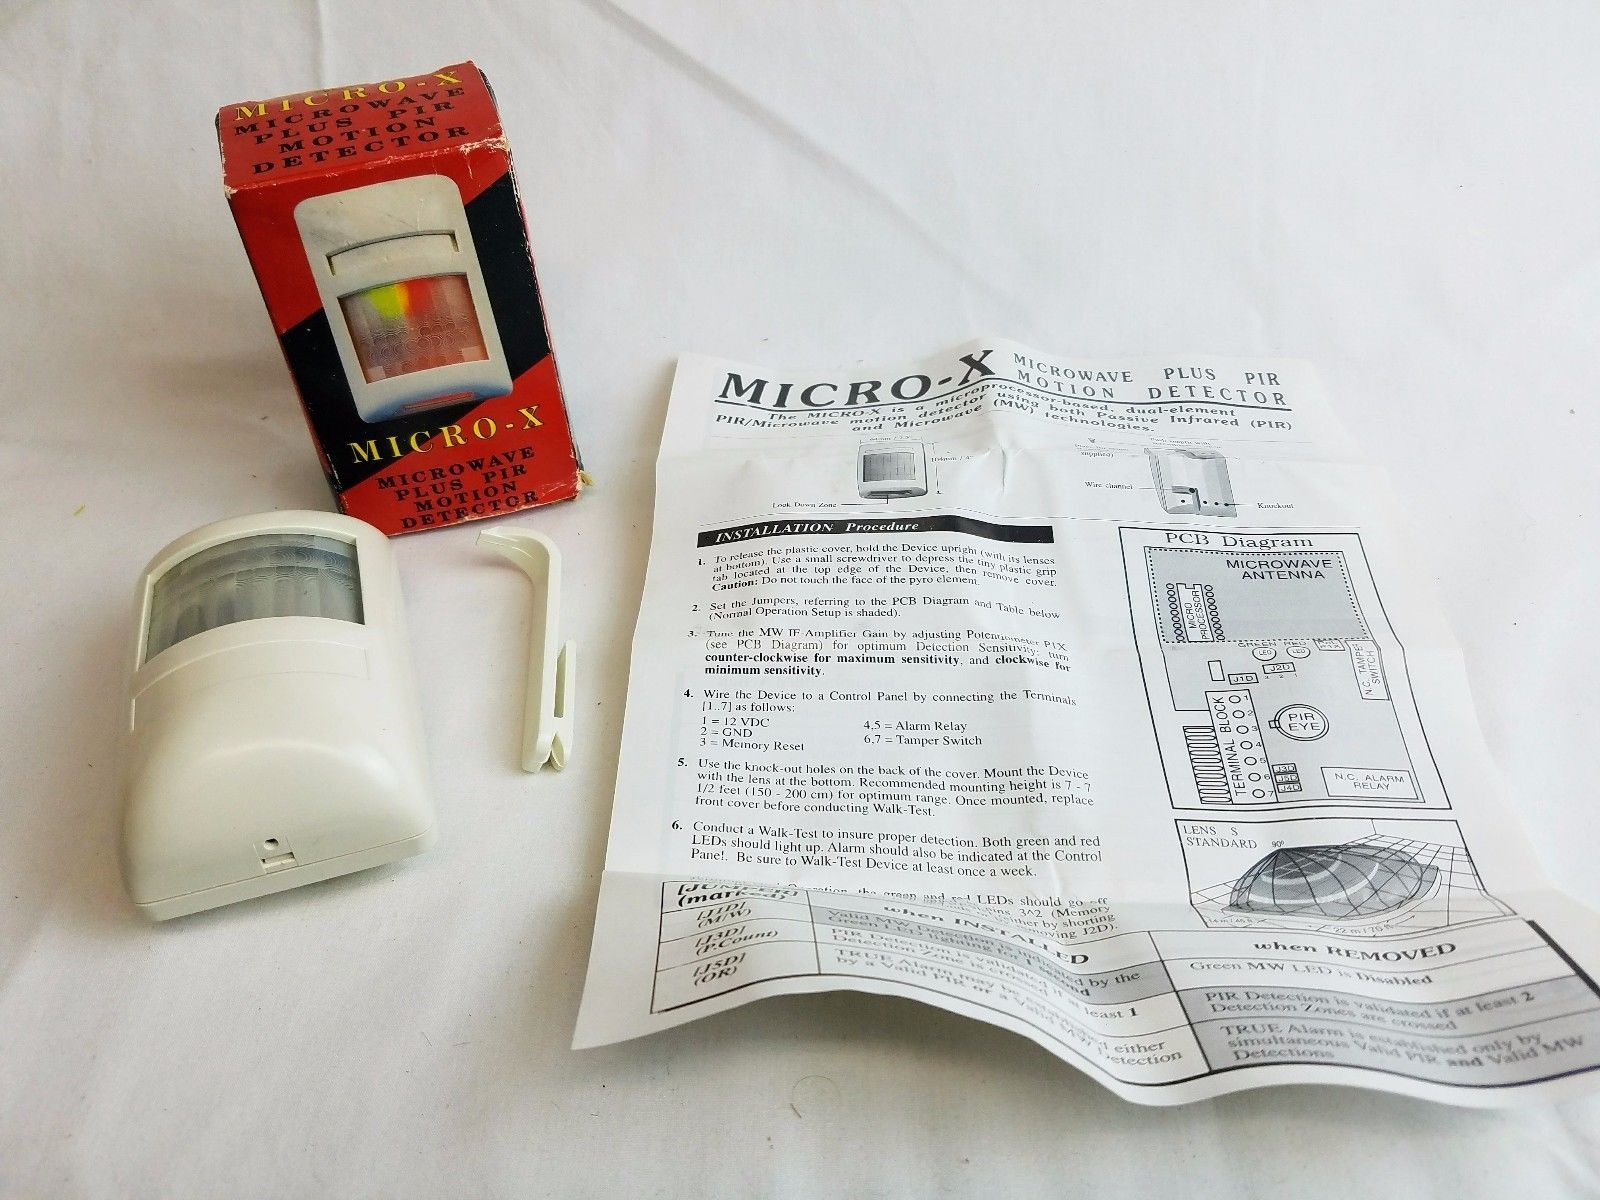
Installation Instructions
1. Open the housing by removing the front cover. To do so, press the tab located on top of the detector.
2. Remove the PCB by unscrewing the PCB screw from the rear of the protective plastic casing. Note: Do not touch the face of the PYRO sensor. -
1 hour ago, norman said:
No, the casing screw (hole) shown @ the top of the photo.
Umm it's the small phillips one just to the left of the red led ?
-
As title any one got any good reviews on a good/basic cctv set up ? Max of two cameras only really need one though. Doesn't need to be wifi enabled, ideally just motion record function.
-
2 minutes ago, al-yeti said:
So you know the model all sorted
Yep
all for the help.
-
Remove the small screw on the pcb and pull board away and fix the the rear of the housing to the surface and re attatch
-
3 hours ago, norman said:
Is that PCB in the case upside down?
No I don't think so, and I think it is the micro x line from looking at PDF online.
-
-
11 hours ago, datadiffusion said:
If this is an unheated workshop the 'off brand' PIR in the Toolstation link would be unsuitable.
Im guessing not much of value in said workshop?
Well the workshop has been extended/built which cost quite a bit so I've used existing old alarm which was out of use got back up and running with new battery etc (optima xm6)....and moved into new side of workshop. It has quite a lot of kit in and has a lot of value I was just trying not to overspend for the sake of it, so next idea for a sensor lol .I'm going to get a full pic of old sensor now.
-
1 hour ago, MrHappy said:
post a pic of the full sensor...
It's back in the work shop as soon as I'm back in there tomorrow I will do.
-
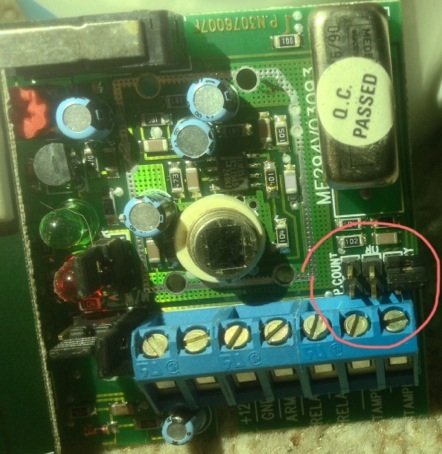
Thanks all to the replies after leaving the system disconnected and re connecting after 24 hrs it seemed to have cured itself, I may still wire in a new pir sensor as lots of comments saying it old and could be past it's used by date. Just randomly put the jumpers in any position. Any recommendations on a new sensor not looking to spend the Earth.
https://www.toolstation.com/shop/p34020?table=no
-
Need some help if anyone is in the know. Just in the progress of moving alarm pir sensor and when connected it's now setting the alarm off, tamper circuit is ok. When the sensor is disconnect the system is fine. Only have one pir on the system and one door connector. I'm not sure if to do with these "jumpers" in the pir sensor is causing the problem. Not sure what they do or how they were connected, one is labeled memory and the other p count. Can anyone shed light on what jumper goes where ? And if they cover two wires horizontally or vertically ? TIA.
 all for the help.
What cctv ?
in !!..DIY Installers..!!
Posted
I think I've got one sorted, I mean basic by the means there is no internet connection at the workshop so it needs to record to sd/tf or hard drive on a rolling basis.